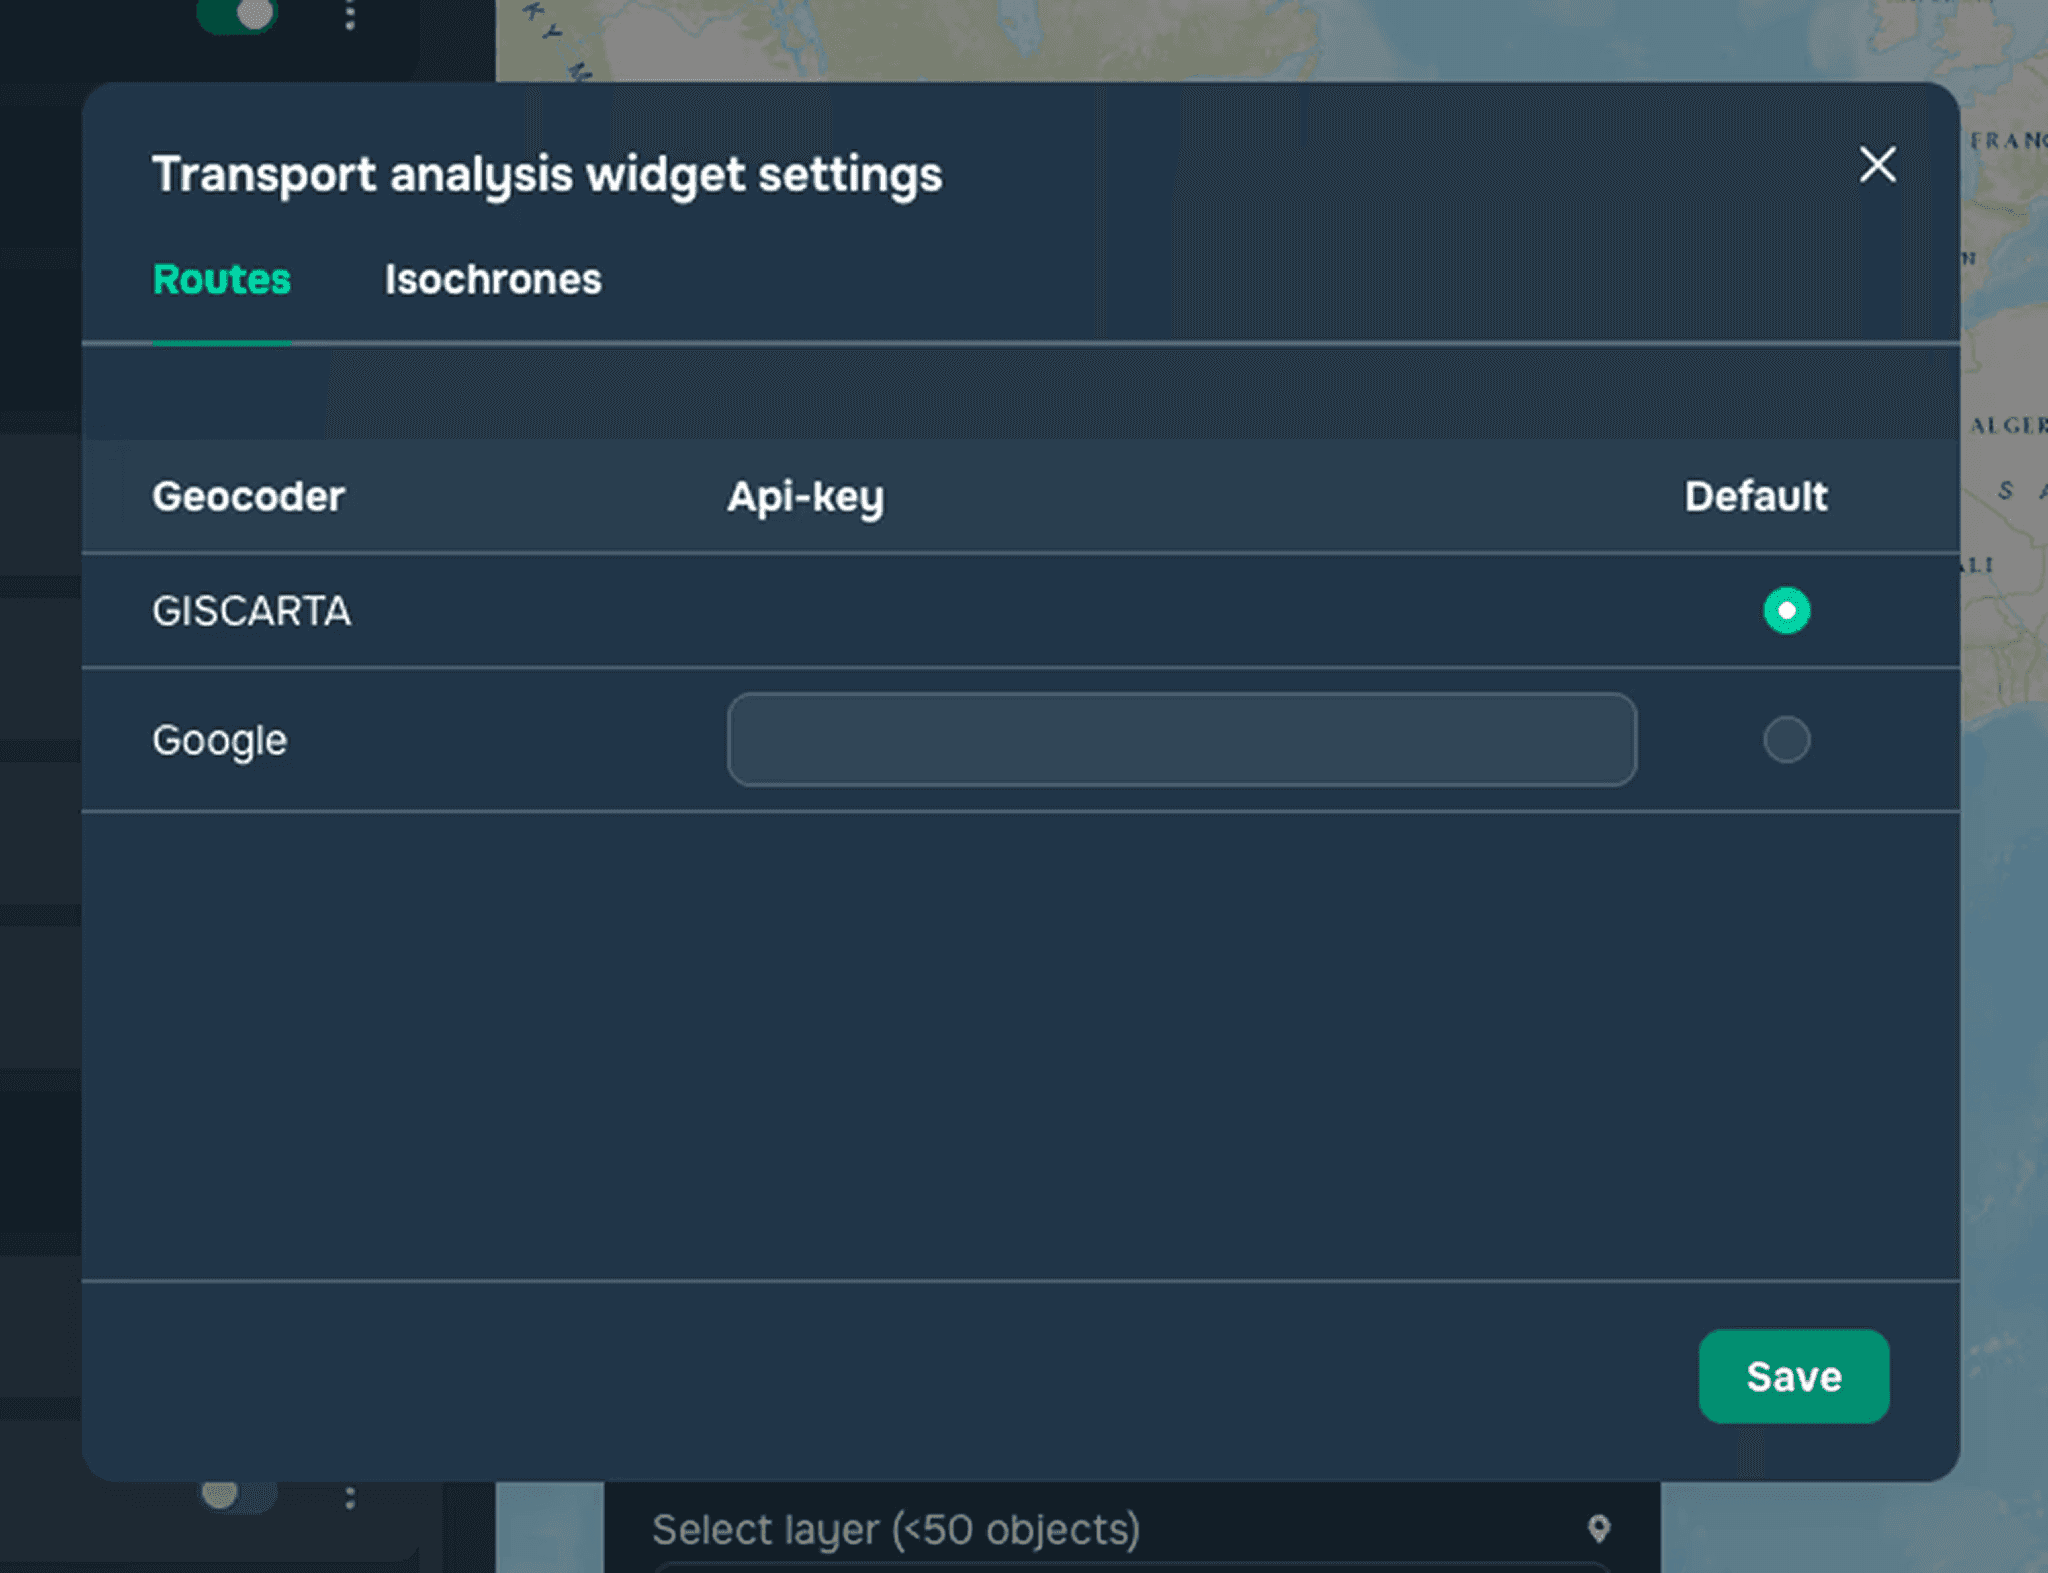
Widget settings
In the widget settings (see Figure 1), you can select a service for generating routes and isochrones (currently, the GISCARTA's source is available).
How the Widget Works
To enable the widget, click on the corresponding icon on the map. After opening the widget, a dialog box appears on the map (see Figure 2) allowing you to choose between generating routes or transport accessibility zones. To generate routes, you must place at least two points on the map. After placing two or more route points on the map, the user can select the mode of travel (car, bicycle, on foot) on which the route will be based.
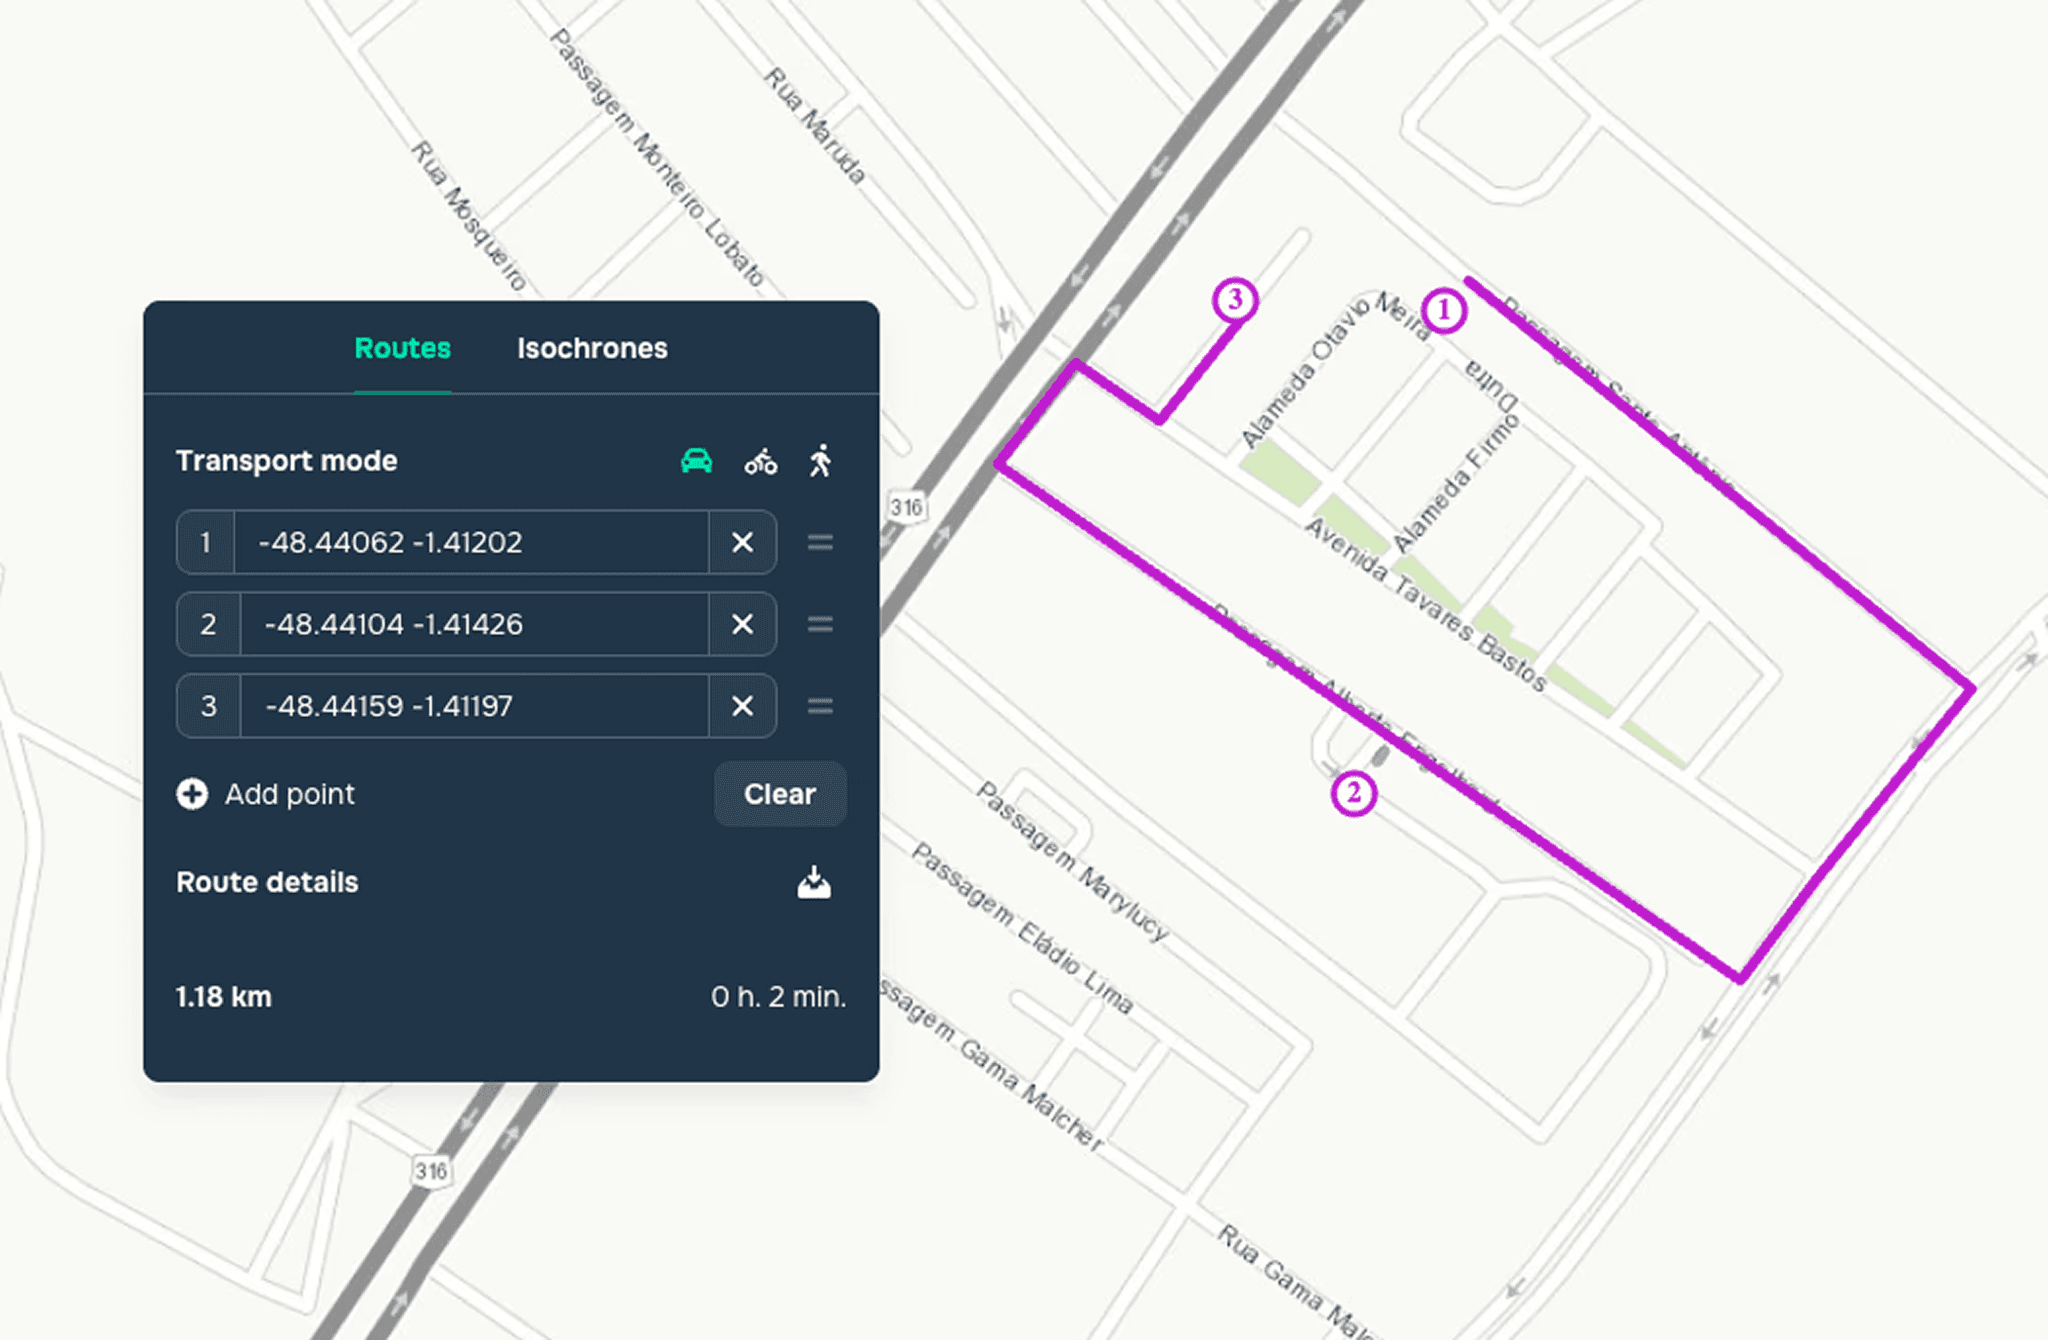
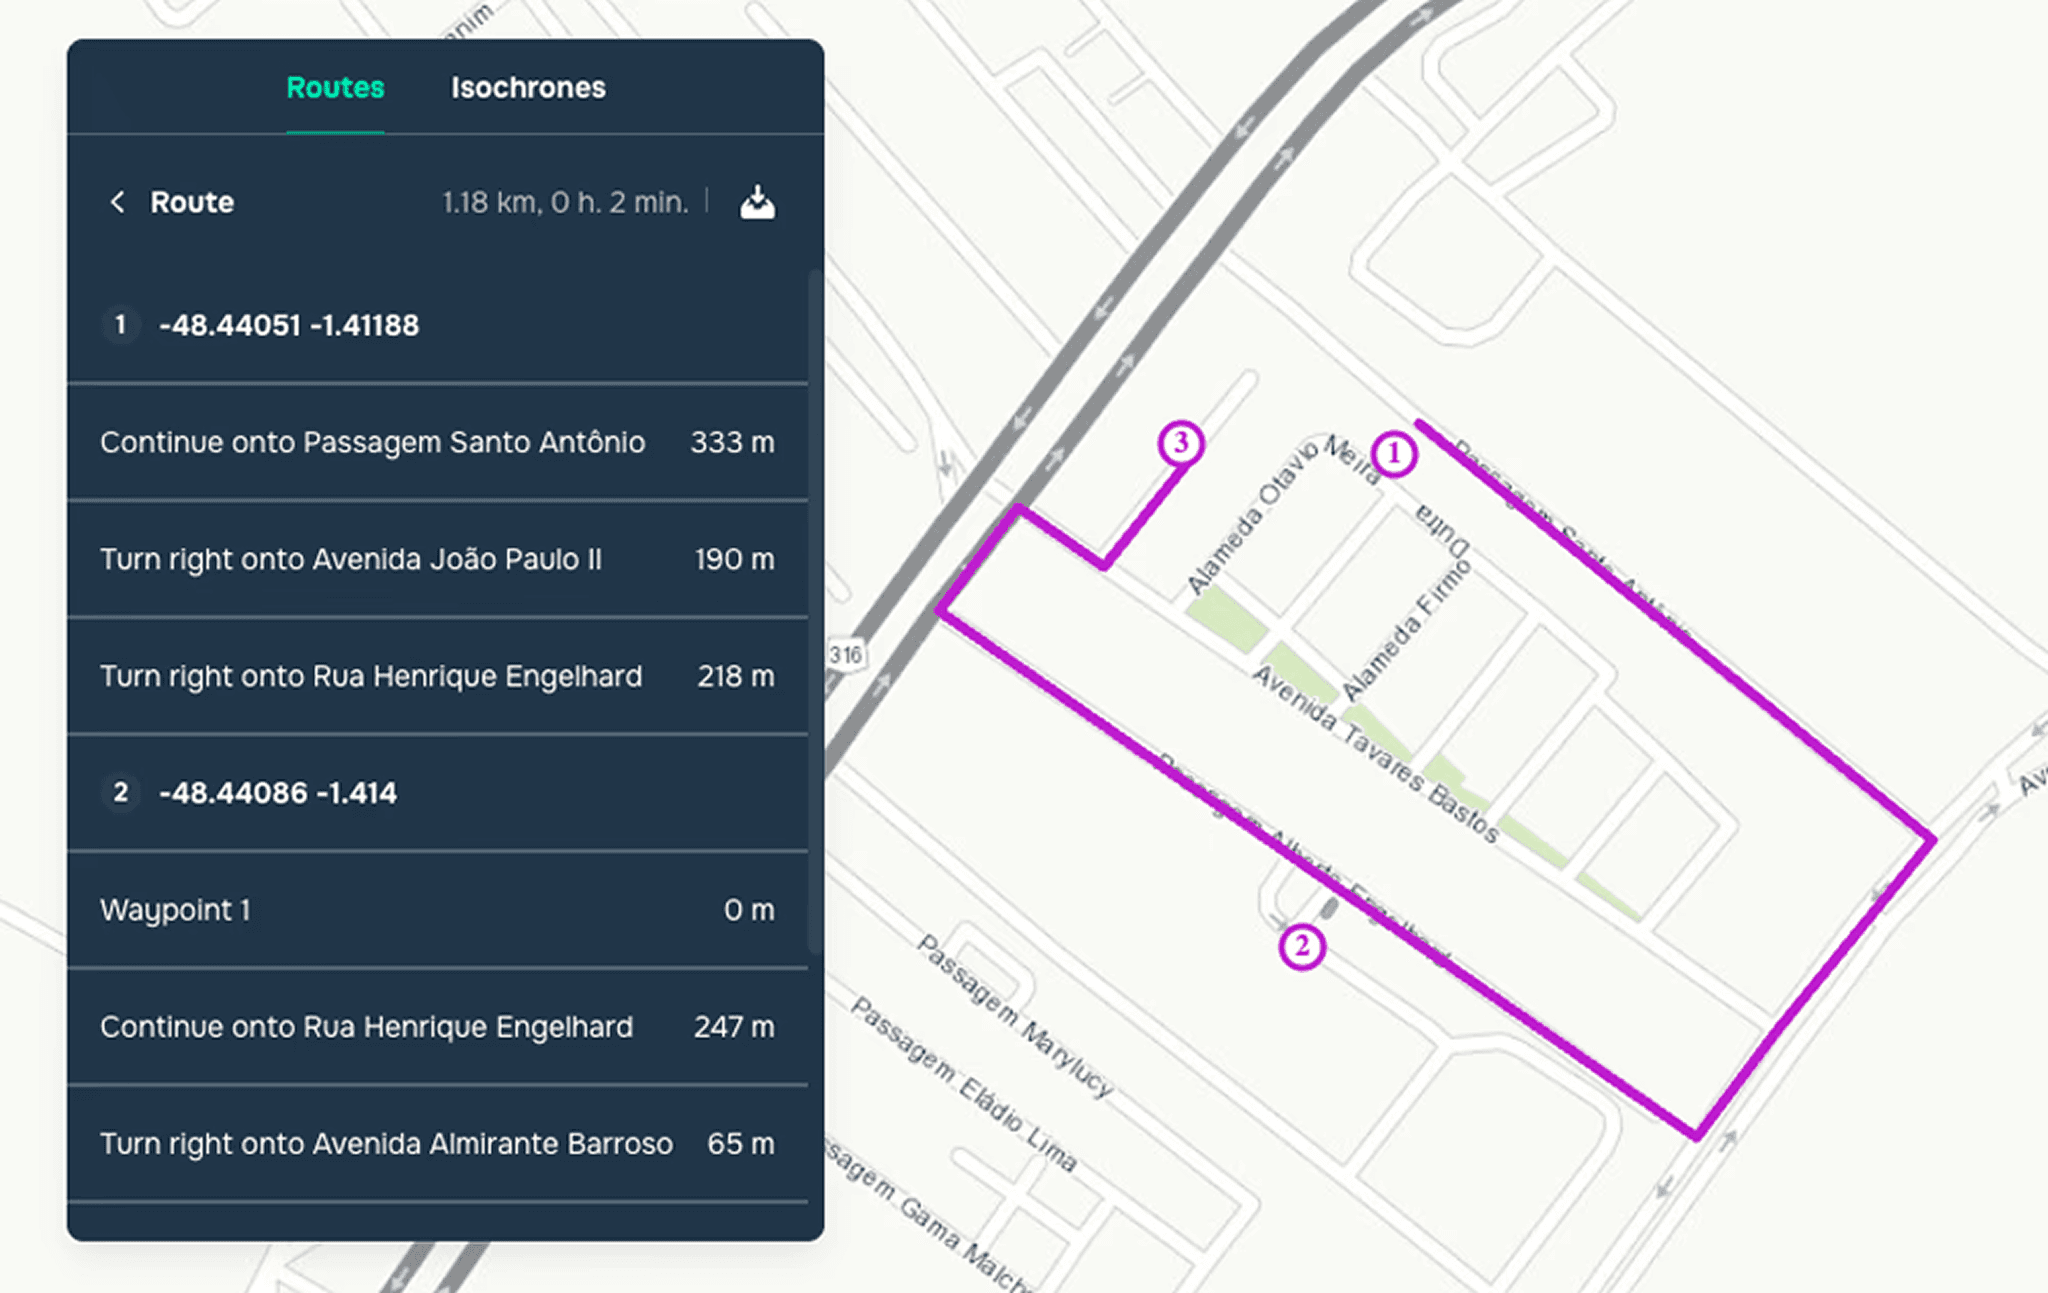
The user can also reorder the route points or view route details by clicking on the displayed route (see Figure 3). The resulting route can be downloaded to Data Sources and to the map.
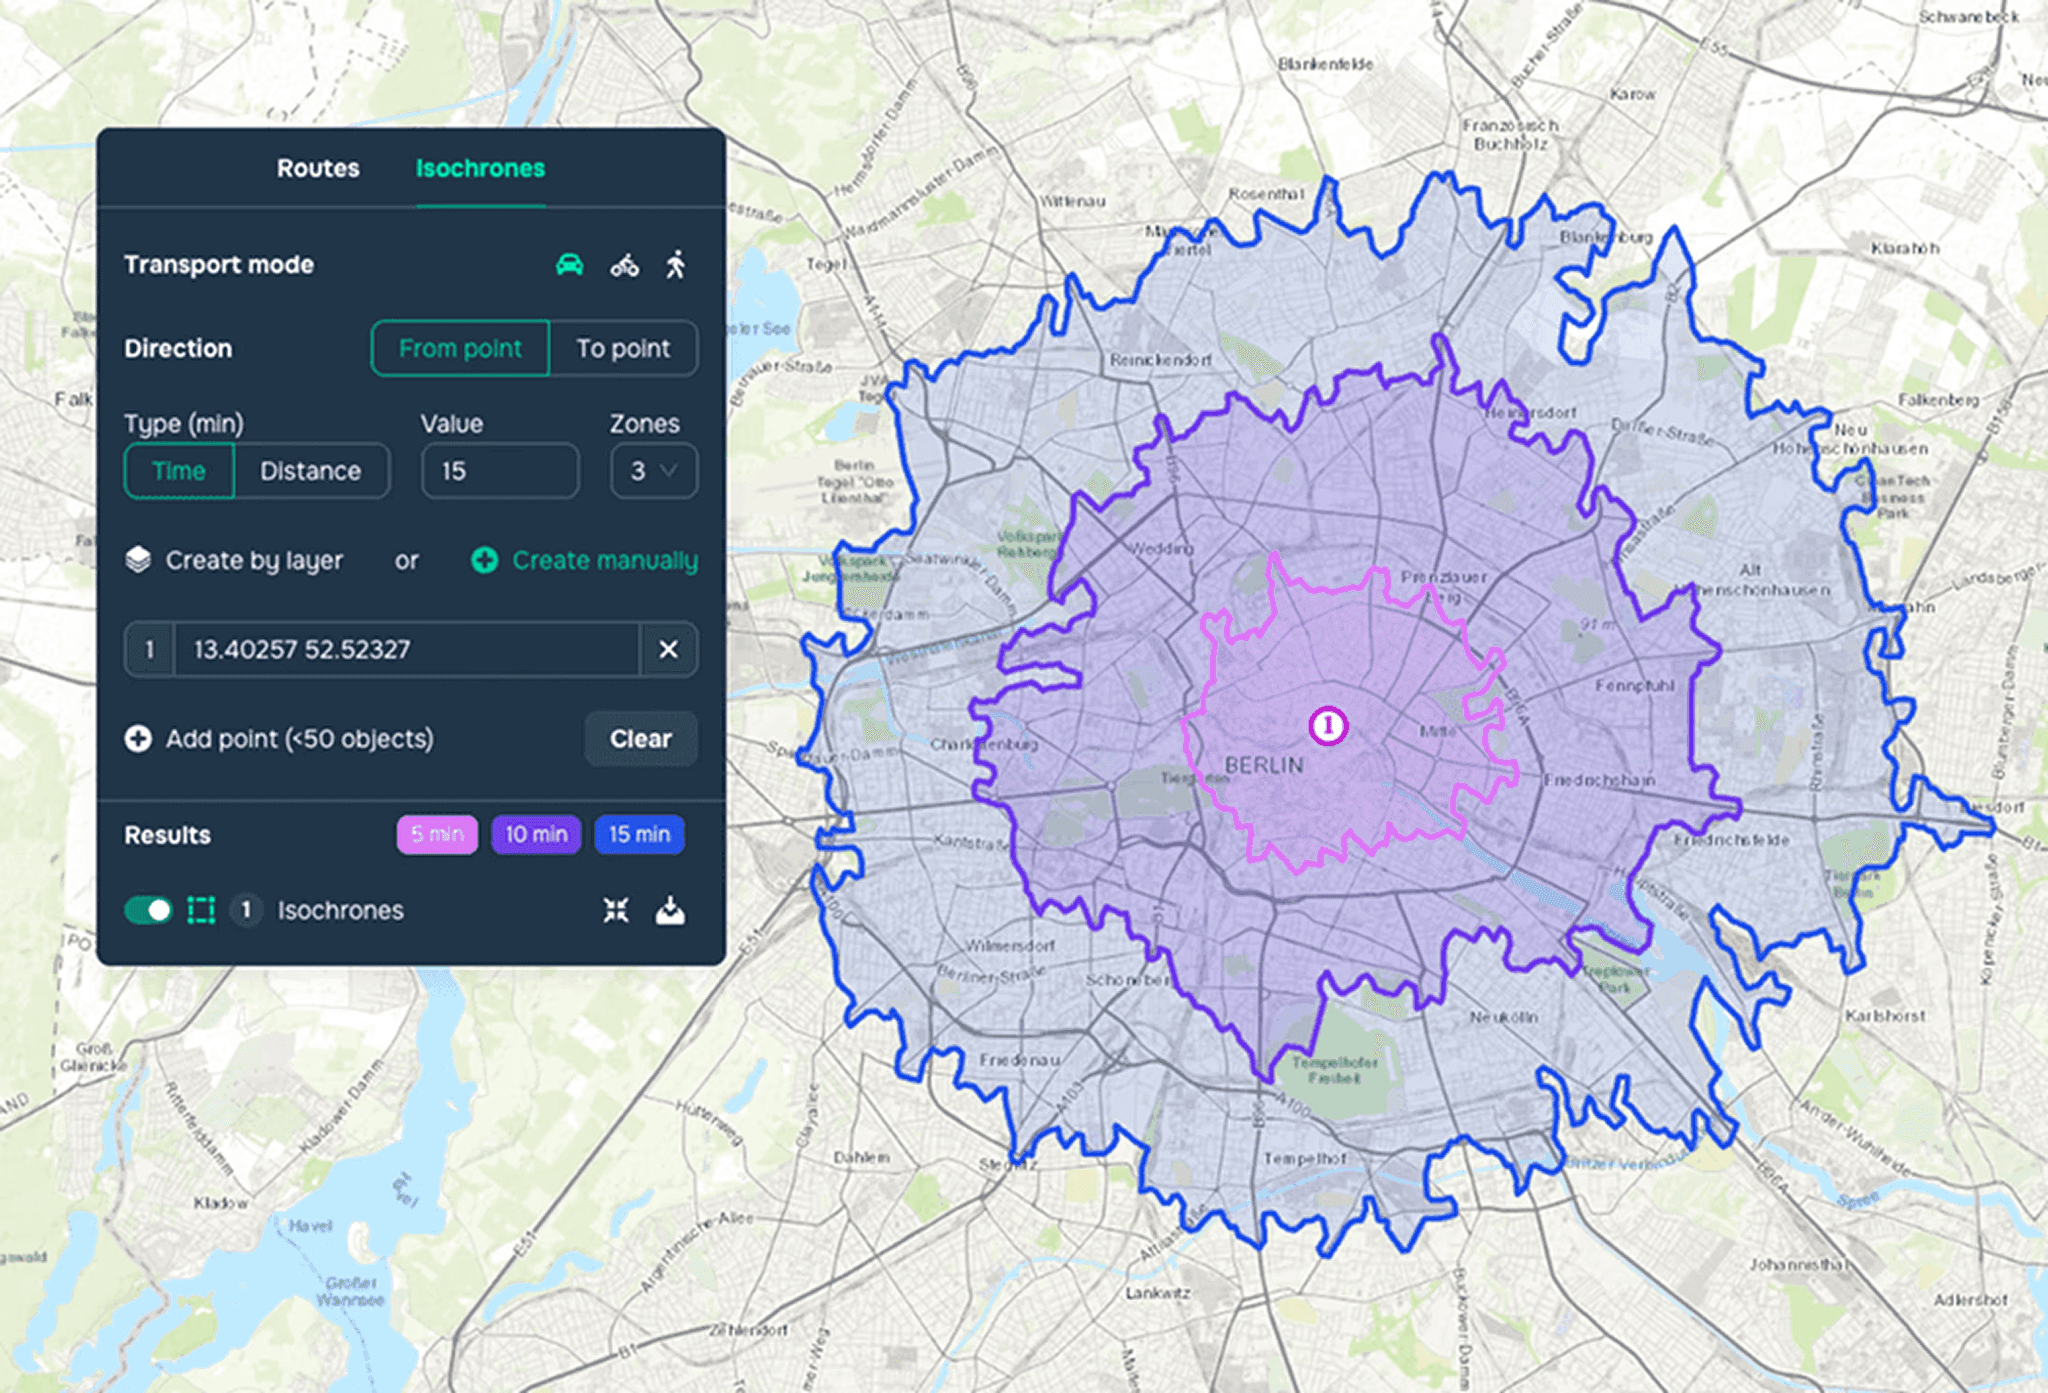
To create transport accessibility zones, the user can go to the corresponding section.
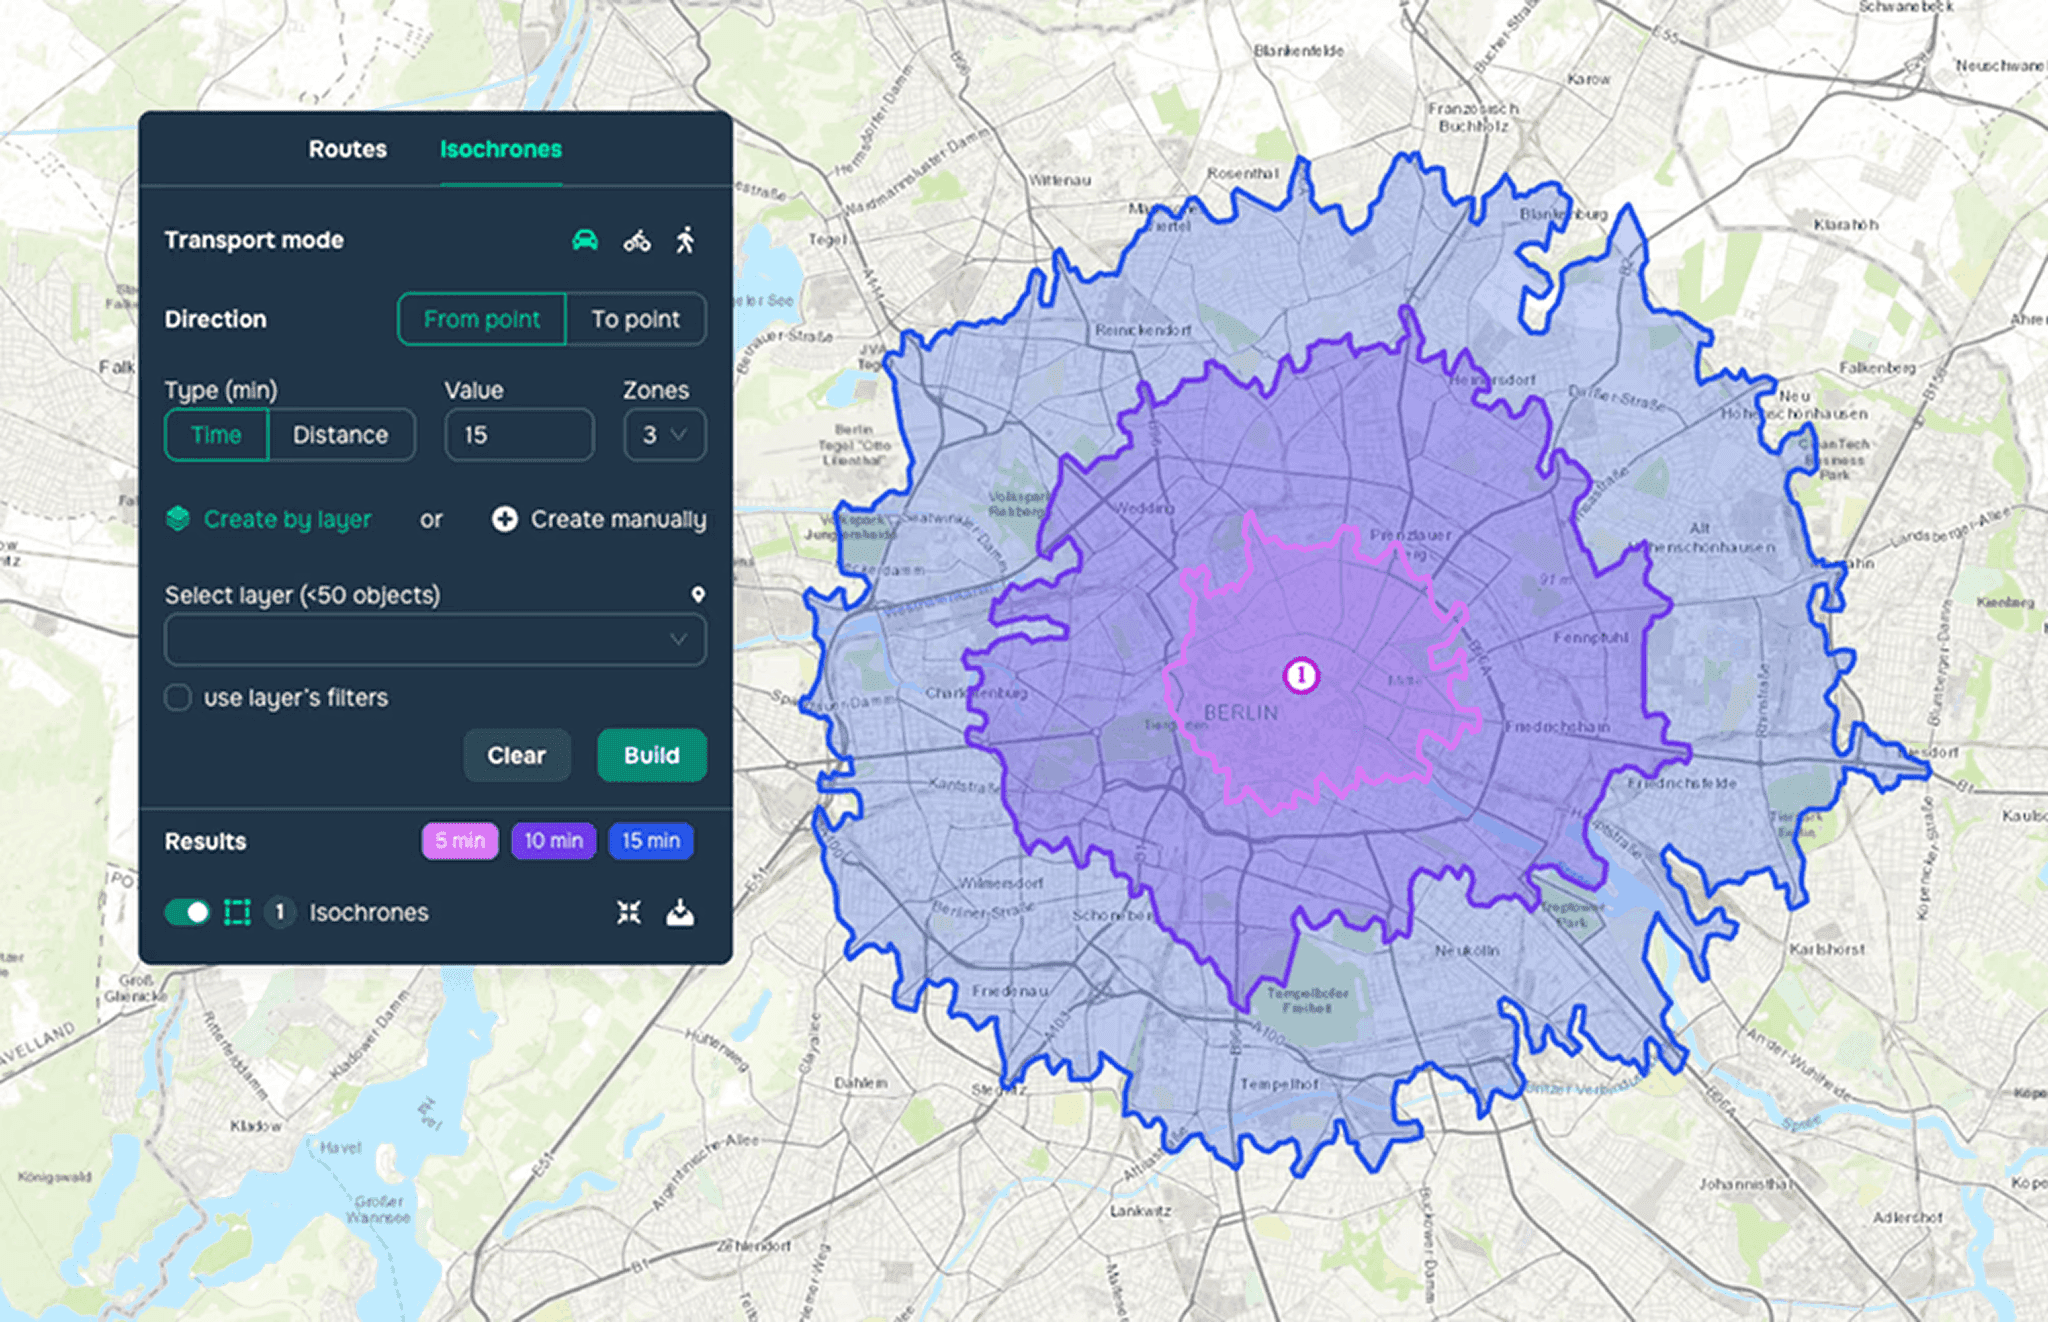
Next, select zone creation based on layer points or by placing points on the map. After the points are placed on the map, the user can change (see Figures 4 and 5):
Transport mode (car, bicycle, on foot)
Direction (from point or to point)
Type – time (minutes) or distance (kilometers)
The value of the zones (in minutes or kilometers)
Number of zones (1, 2 or 3)
Users can also download the results of the accessibility zone analysis to their Data Sources and onto the map.